Blog/Hosting a Network-Attached Storage (NAS) device on SIMBA's 10Gbps Home Broadband Service
Hosting a Network-Attached Storage (NAS) device on SIMBA's 10Gbps Home Broadband Service


 23 June 2025
 SIMBA
SIMBA


As an alternative to “Cloud Based” services for the storage of photos and general data files, it is becoming increasingly common to setup a Network-Attached Storage (NAS) device at home to “Self-Host” these services. The primary advantage of this is a vastly increased storage capacity and the presumption of more complete control over the data. In relation to the cost of the solution, this is largely a “CAPEX vs OPEX” consideration.
This brief guide outlines the process for SIMBA 10Gbps Home Broadband customers who would like to host a Synology NAS at home. The specific device referenced in this article is a DS723+ but any Synology NAS running DSM 7.2 onwards is expected to behave similarly. We chose the Synology DS723+ as this is the lowest-cost NAS Device model we have found that supports a 10Gbps Ethernet port, thus maximising the utilisation of the available bandwidth of the SIMBA 10Gbps Broadband connection at an affordable price point.
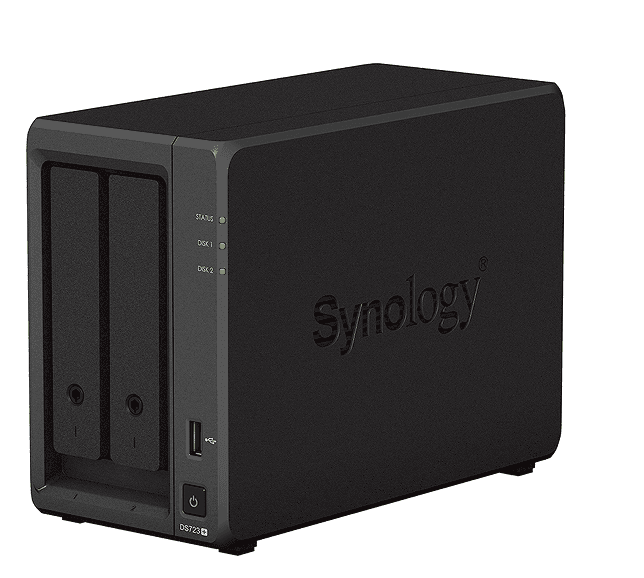
Synology DS723+ — a dual-bay NAS device supporting 10Gbps Ethernet.
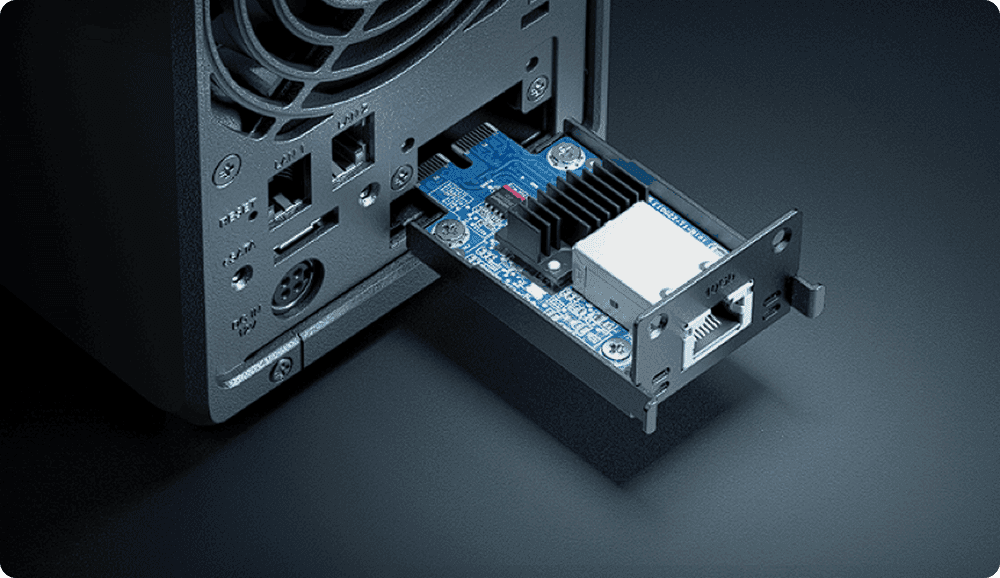
The optional additional 10Gb Ethernet port of the Synology DS723+
Step-by-step guide to self-host a Network-Attached Storage (NAS)
Note: This is based on a D-Link DPN-BE7212GR 10Gbps router linked to a Synology DS723+ with the optional 10Gbps port.
Step 1: Setup the router
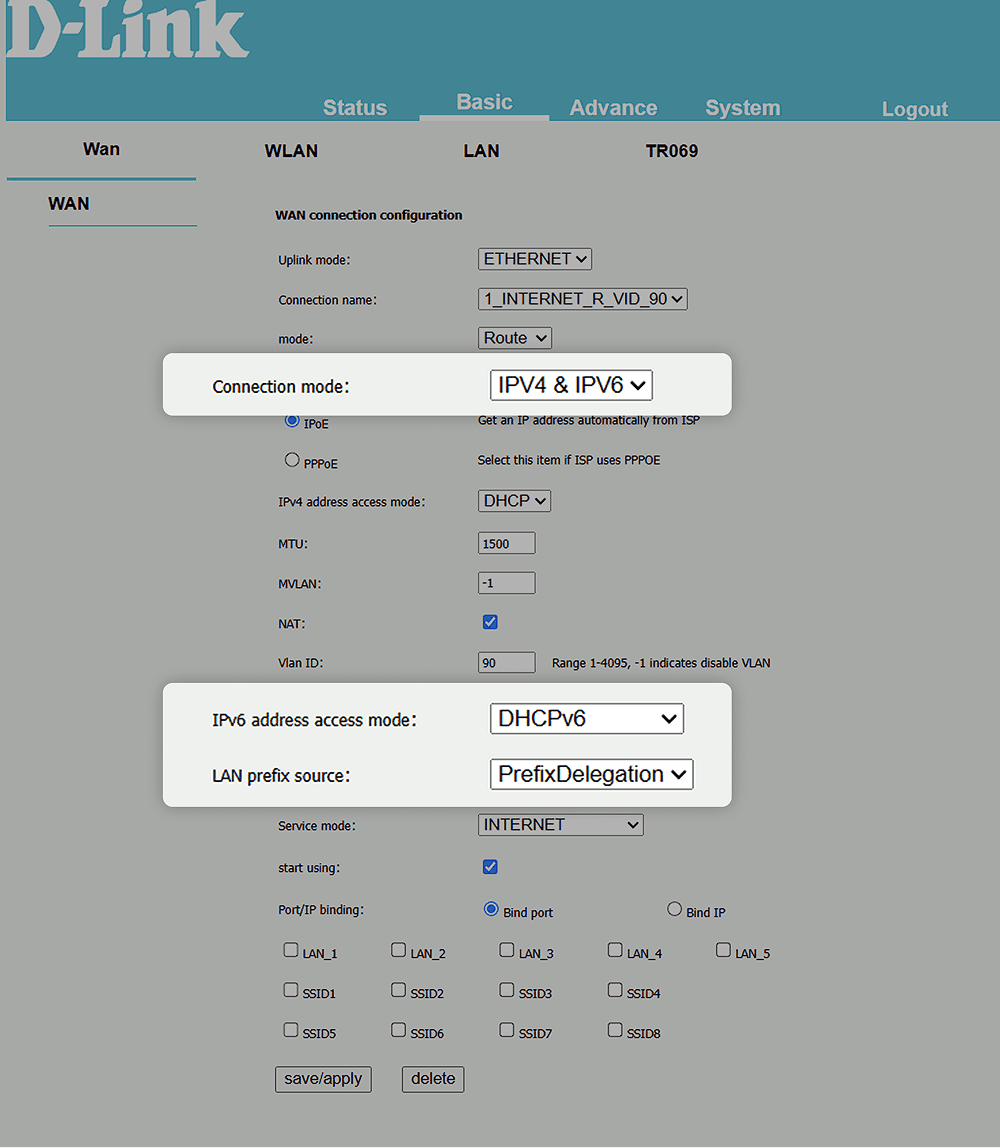
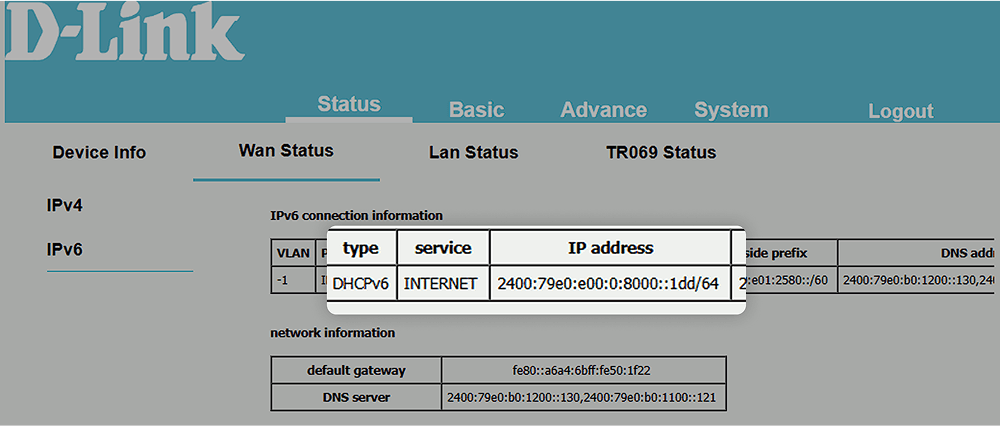
For this router, which is included in our 2 year plan, IPv6 is enabled by default. If you are using a different router, check that IPv6 is enabled to use DHCPv6 and that the LAN side prefix is obtained by DHCPv6-PD (Prefix Delegation).
Step 2: Setup the Network-Attached Storage (NAS)
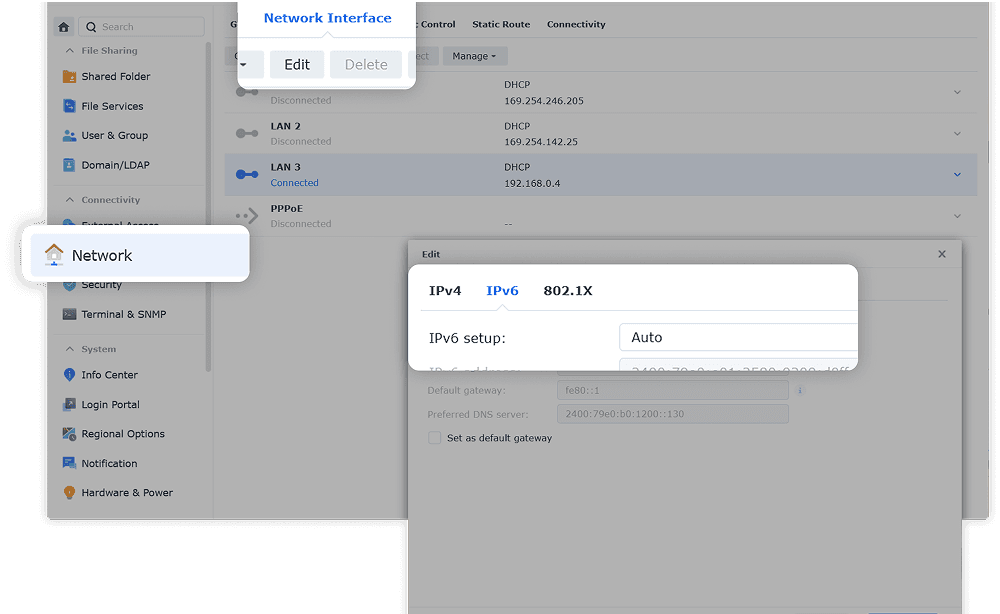
Follow the Synology guide to do the initial setup of the NAS. Once you have access to the DiskStation Manager (DSM), login and go to the Control Panel to confirm that IPv6 is enabled.
*Note that the screenshot below shows LAN 3 which is the 10Gbps port. If you are using one of the built-in 1Gbps ports, it would be LAN 1 or LAN 2. The configuration is similar, but you will not achieve the optimum throughput which SIMBA 10Gbps Broadband is capable of.
Step 3: Configure QuickConnect and Dynamic DNS (DDNS)
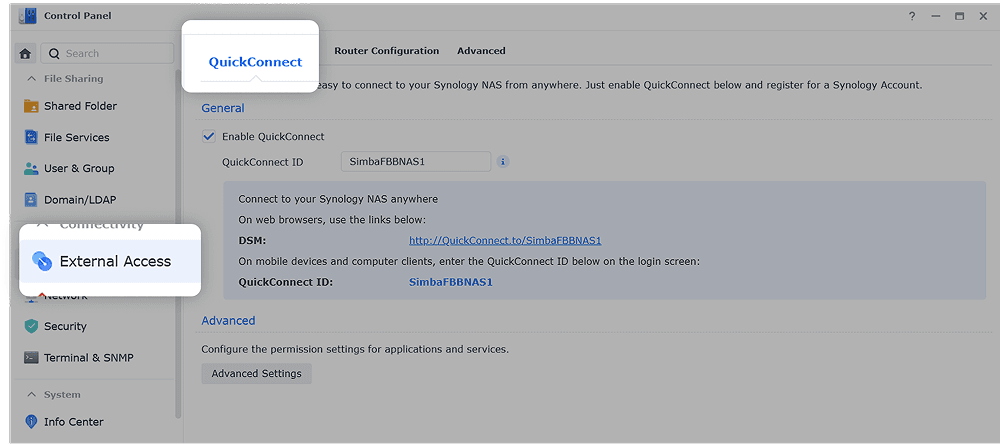
You will need to sign-up for a Synology Account to use QuickConnect. This is an IPv4 fallback if you are accessing your NAS from an older network that does not support IPv6. This is not needed if your Mobile Phone is on a SIMBA plan as our APNs fully support IPv6. You will however need to ensure it is turned on for your Phone.
In this example screenshot, we have named the NAS, “SIMBAFBBNAS1”.
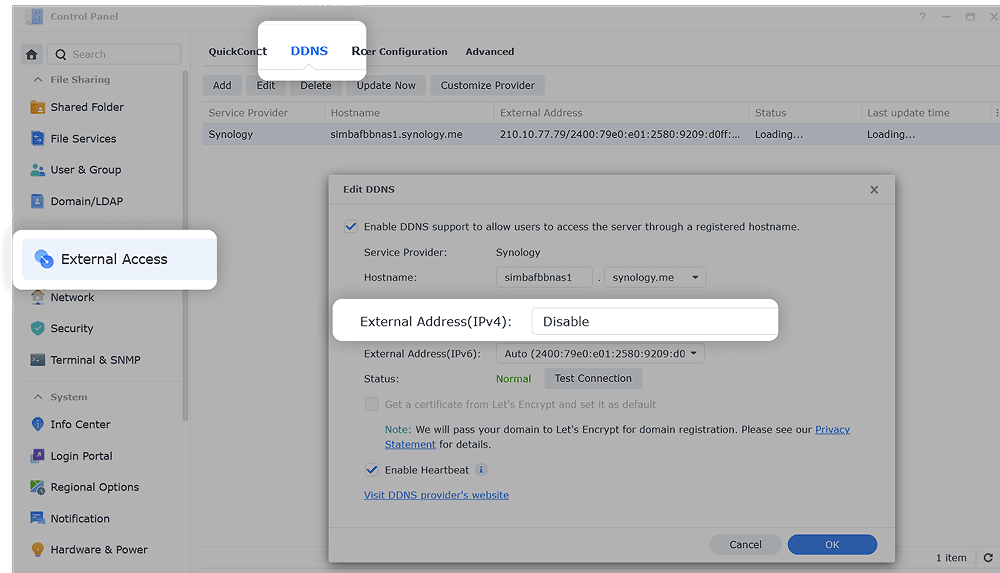
Next, you will need to configure the Dynamic DNS system for IPv6. This will publish the IPv6 address which has been allocated to your NAS by the Router. The Router obtains this IPv6 address from our DHCPv6 Server. We suggest using the synology.me DDNS service as it is easy to configure. It is important that IPv4 should be disabled for this DDNS entry. Access to the NAS via IPv4 should not be via this DDNS entry but rather via QuickConnect.
For consistency, we suggest naming the DDNS entry with the same name as your QuickConnect ID even though there is no hard requirement for them to be the same.
Step 4: Testing
With the three previous steps completed, you are ready to test your NAS from the outside.
Download the Synology Apps to your Phone:
- Synology DS finder
- Synology Drive
- Synology Photos
And any others you might want to use.
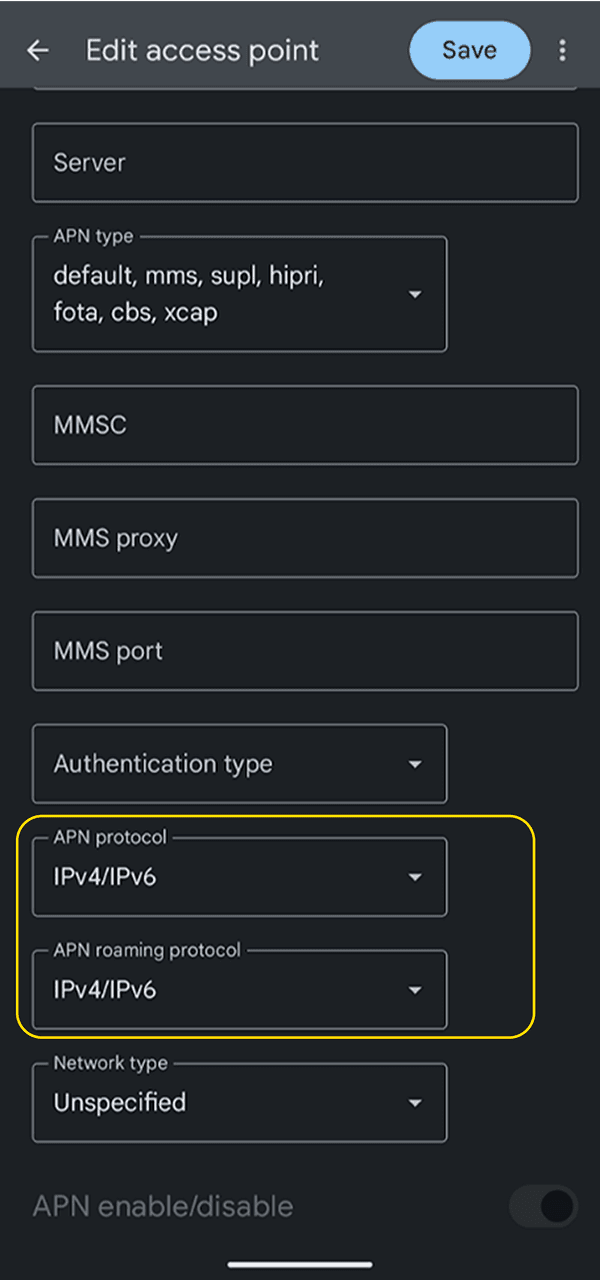
To test reachability from outside of your home network, ensure that your Phone is no longer connected to the WiFi of your SIMBA 10Gbps Broadband service. You should also check your APN settings to ensure that IPv6 is turned on.
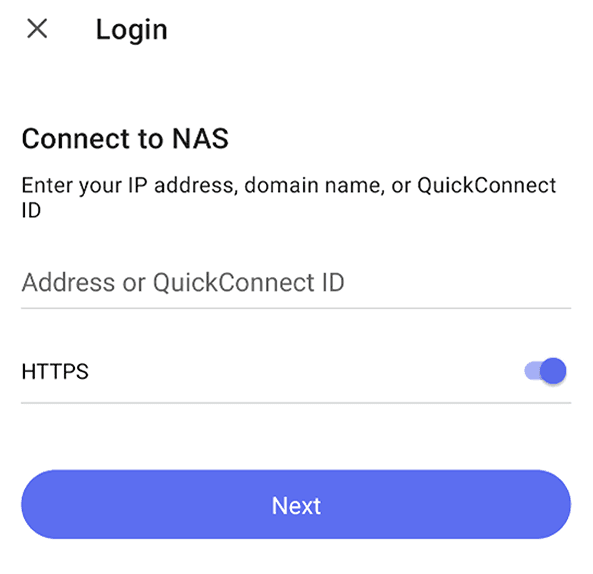
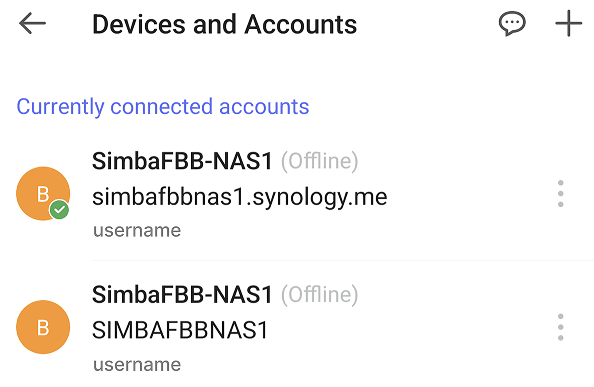
In this example, DS Finder is being launched, and the prompt is for an “IP Address, FQDN or QuickConnect ID.” Setting up an entry for both “simbafbbnas1.synology.me” (as a FQDN which resolves to an IPv6 address) and another entry for “SIMBAFBBNAS1” (as a QuickConnect ID) ensures that you will be able to access your NAS from any external network. IPv6 is the preferred mode where the external network supports it.
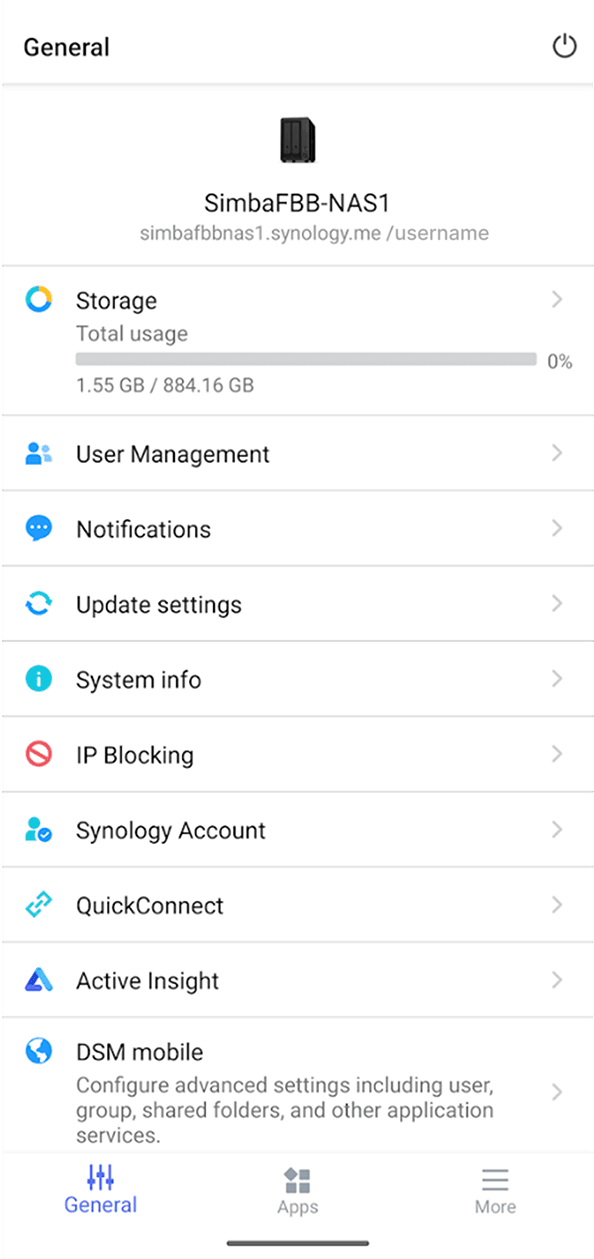
You can now access your NAS remotely. For setup of Synology Drive and Synology Photos or other services, please refer to the Synology documentation.
Just note that you should use the address <WhateverYouHaveNamedYourNAS>.synology.me (e.g. simbafbbnas1.synology.me) as the 1st choice and then the QuickConnect ID as 2nd choice when you only have access to an IPv4 network.
The Synology NAS that we have used in this guide is available online. You may access it using any of these three usernames: simbafbb, simbafbb2, simbafbb3. The password of all three accounts is “IPv6.is.the.future!”
Note that you should not assume anything you store on these accounts will remain there forever. It is setup as an open demo platform.
There has been some talk online that Broadband services deploying Carrier Grade NAT (CGN) do not allow for hosted services such as a NAS. We hope this document and the live demo dispels this myth.
Enjoy your SIMBA 10Gbps Broadband service!